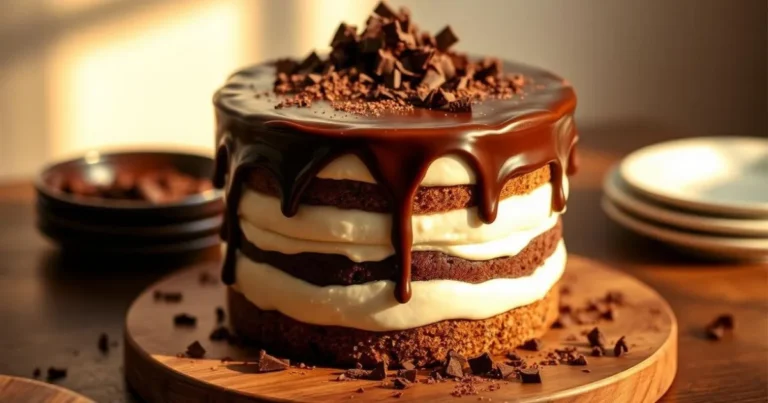
Simple Dirt Cake Recipe: No Bake Halloween Treats
As autumn arrives, the air fills with cinnamon and nutmeg. Halloween is here, and with it, the chance to enjoy rich treats. No-bake dirt cake is a favorite, bringing joy and nostalgia with every bite.
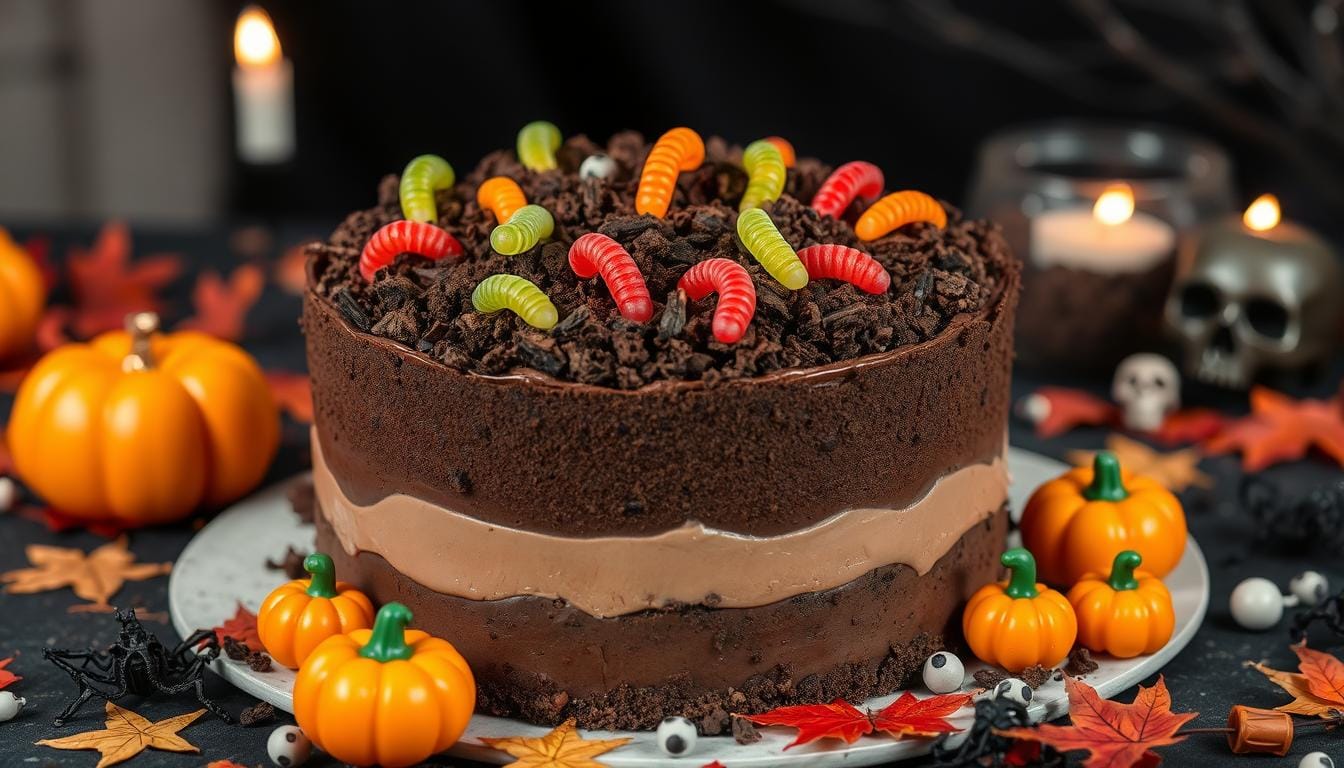
My grandmother’s dirt cake was a Halloween highlight when I was young. It mixed chocolate pudding, Oreos, and edible “dirt” for a treat that excited us all. Now, I’m sharing this recipe with you, so you can make memories with your family.
Table of Contents
What Makes This Halloween Dirt Cake Special
This Halloween dirt cake is a fun and kid-friendly no-bake treat. It’s great for school parties and events. It’s quick to make, taking just 10 minutes, which is perfect for busy parents or last-minute parties.
The recipe can be made in many ways, from spooky graveyard cake to creepy crawly snack. This lets you match it to different Halloween themes and tastes.
Kid-Friendly No-Bake Dessert
The Halloween dirt cake is a favorite “worms and dirt” dessert for kids. It’s easy to make and fun for kids to help with. They’ll love the fun presentation and getting to decorate it.
Perfect for School Parties and Events
This dessert is perfect for school parties, fall festivals, and other seasonal events. It’s easy to take and prepare, making it a great choice for busy parents and teachers. Kids of all ages will love these kid-friendly halloween treats.
Quick 10-Minute Preparation
The Halloween dirt cake is ready in just 10 minutes. This makes it a quick and easy dessert for any Halloween party or event. It lets hosts enjoy the celebration without spending hours cooking.
Essential Ingredients for Your Spooky Dirt Cake
Making the perfect dirt cake for Halloween is all about the ingredients. This no-bake treat mixes classic tastes with a spooky twist. It’s a favorite at any halloween party food gathering. The key parts of this recipe are:
- Oreo cookies, crushed into a fine “dirt” texture
- Instant chocolatey dessert cups pudding mix, mixed with milk for a creamy base
- Cream cheese and unsalted butter, whipped with powdered sugar and vanilla for a fluffy filling
- Cool Whip or freshly whipped cream for a light, airy topping
To make the dirt cake come alive, add Halloween-themed decorations. Use pumpkin candies, Milano cookies, white chocolate, candy eyes, and black gel icing. You can choose any decorations you like to match your style.
Whether you stick with chocolate pudding or try new flavors, this easy recipe will impress everyone. It’s perfect for both kids and adults at your halloween party food events.
Simple Dirt Cake Recipe No Bake Halloween
Making a fun no-bake Halloween treat is easy with this simple dirt cake recipe. It’s ready in just 15 minutes. This makes it great for adding to your spooky celebrations at the last minute.
Basic Equipment Needed
To make these easy no-bake chocolate pudding cups, you’ll need a few basic tools:
- Mixing bowls
- Whisk
- Rubber spatula
- Electric mixer
- Food processor
- Triggered cookie scoop
Room Temperature Tips
For the best results, make sure all your ingredients are at room temperature. This will help you get a creamy texture in your no bake chocolate pudding cups.
Mixing Instructions
Begin by crushing 25.5 oz of Oreo cookies in a food processor. Press 2/3 of the Oreo crumbs into a 9×13 baking dish to make the “dirt” layer. In another bowl, mix 2 cups of cold milk with a 3.4 oz box of instant chocolate pudding mix until well combined.
Then, beat 16 oz of cream cheese, 8 oz of Cool Whip, 1/3 cup powdered sugar, and 1 tsp of vanilla extract until light and fluffy. Gently fold the chocolate pudding mixture into the cream cheese mixture. Spread this over the Oreo crust.
Top the dessert with the remaining Oreo crumbs. Refrigerate for at least 4 hours, or until set. Decorate with pumpkin candies or other spooky toppings just before serving for a festive Halloween presentation.
This quick chilled dessert is perfect for Halloween. Enjoy the rich chocolate flavor and crunchy Oreo texture in every bite of these easy-to-make dirt cake cups.
Creative Halloween Decorating Options
Take your homemade spooky graveyard cake to the next level with these creative decorating ideas. Turn simple Milano cookies into ghostly treats by dipping them in white chocolate and adding candy eyes. Add pumpkin candies, chocolate tombstones with “RIP” in icing, and mummies from drizzled white chocolate for an eerie touch.
For a creepy crawly snack, use Halloween-themed silicone molds to make unique chocolate shapes like spiders or bats. Gummy worms, colorful sprinkles, and themed candies can also add to the spooky vibe of your dirt cake. The possibilities are endless to make your Halloween dessert stand out.
| Decoration Idea | Ingredients Needed | Time Required |
|---|---|---|
| Ghost Milano Cookies | Milano cookies, white chocolate, candy eyes | 15 minutes |
| Chocolate Tombstones | Chocolate, piping bag, icing | 20 minutes |
| Mummy Drizzle | White chocolate, spooky sprinkles | 10 minutes |
| Chocolate Molds | Chocolate, Halloween-themed silicone molds | 30 minutes |
With these creative decorating ideas, your spooky graveyard cake will be the star of any Halloween party or gathering. Get creative and have fun bringing your Halloween dirt cake to life!

Pudding Variations and Flavor Combinations
Creating the perfect easy halloween dessert is all about trying new things. You can mix up the classic chocolate pudding with different instant pudding mixes. This way, you can make unique and tasty oreo dirt pudding treats.
Chocolate vs. Vanilla Base
Chocolate pudding is a favorite for oreo dirt pudding because it’s so rich. But, you can also try vanilla, butterscotch, or pistachio pudding. These flavors add a fun twist to the classic Halloween dessert.
Seasonal Flavor Ideas
- Pumpkin Spice: Try a pumpkin spice easy halloween dessert for a fall taste.
- Caramel Apple: Mix caramel with apples for a sweet and tangy oreo dirt pudding twist.
- Spooky Slime: Use pistachio pudding for a “slime-like” effect that’s perfect for Halloween.
When picking pudding flavors, think about who you’re serving. Especially at school events or parties, consider any allergies. A little creativity can turn this classic dessert into a spooktacular treat.
Making the Perfect Oreo Dirt Layer
Creating a delightful oreo dirt pudding is key for the ultimate spooky chocolatey dessert cups. Start by crushing a whole 15.5-ounce package of Oreo cookies into fine crumbs. Then, press two-thirds of the crushed Oreos onto the bottom of a 9×13 inch pan. This forms a firm base.
Spread the rich and creamy pudding mixture over the Oreo cookie crust. Sprinkle the remaining one-third of the Oreo crumbs on top. This gives the “dirt” effect, like a freshly dug graveyard. For individual servings, place a tablespoon of crushed Oreos at the bottom of each clear plastic cup. Add the pudding and top with more crumbs.
- Crush an entire 15.5-ounce package of Oreo cookies into fine crumbs.
- Press two-thirds of the crushed Oreos onto the bottom of a 9×13 inch pan.
- Spread the pudding mixture over the Oreo cookie crust.
- Sprinkle the remaining one-third of Oreo crumbs on top to create the “dirt” effect.
- For individual servings, place a tablespoon of crushed Oreos in the bottom of each cup before adding the pudding and topping with more crumbs.

By following these simple steps, you can easily create a visually stunning and delicious oreo dirt pudding. It will have your guests raving about your spooky and chocolatey dessert cups. The rich Oreo cookie crust and creamy pudding filling will satisfy any sweet tooth.
Spooky Topping Ideas and Decorations
Halloween is a time for spooky fun, and nothing says that like a creepy crawly halloween party food like a homemade dirt cake. Once you’ve got the basic no-bake dirt cake recipe down, it’s time to get creative. Add spooky toppings and decorations that will make your guests scream with joy.
Ghost Milano Cookies
Transform classic Milano cookies into adorable ghosts. Just dip them in melted white chocolate and add candy eyes. These creepy crawly snack ideas add a playful and festive touch to your Halloween dirt cake.
Candy Options
- Pumpkin-shaped candies
- Gummy worms
- Halloween-themed sprinkles
Scatter these sweet and spooky treats over your dirt cake for a frightening display. The mix of crunchy Oreo crumbs, rich chocolate pudding, and playful candy will have guests asking for more.
Edible Halloween Props
Get creative with edible Halloween props for your dirt cake. Use undipped Milano cookies to make tombstones with melted chocolate or gel icing. For a mummy look, drizzle white chocolate over dipped cookies and add candy eyes. You can also use Halloween-themed silicone molds to make chocolate shapes like ghosts or pumpkins, adding a festive touch.
With these spooky topping ideas and decorations, your homemade dirt cake will be the star of any Halloween party. Get the whole family involved in the fun. Let your creativity run wild – the possibilities are endless for making this halloween party food truly haunting.
Storage Tips and Make-Ahead Instructions
Making a batch of spooky quick chilled desserts like Halloween dirt cake is easy. But, what about storing and preparing it in advance? This easy halloween dessert is great for parties and events. With a few simple tips, you can enjoy it without stress.
Remember, this dirt cake has dairy, so it must be refrigerated. It stays fresh for up to 5 days in an airtight container. For the best taste and texture, chill it for at least 4 hours before serving.
This Halloween treat is perfect for busy times because it can be made ahead. Prepare it the day before your event. This way, it’s ready to serve when your guests arrive. It reduces your stress and ensures the dessert is fully set and impressive.
| Ingredient | Amount |
|---|---|
| Chocolate sandwich cookies (Oreo) | 20 |
| Instant chocolate pudding mix | 1, 3.9-ounce box |
| Milk (skim or 2% dairy) | 2 cups |
| Frozen whipped topping, thawed | 8 ounces |
| Gummy worms (for decoration) | 30 |
With these tips, you can enjoy this quick chilled desserts and easy halloween dessert easily. This leaves you more time for the spooky fun and festivities.
Dietary Modifications and Allergen Information
Hosting a kid-friendly Halloween party or just want a tasty no-bake treat? This dirt cake recipe can be made to fit different diets. For a gluten-free version, replace Oreos with gluten-free cookies. Make sure all ingredients are gluten-free too. Even though Oreos, Milano cookies, and Jello pudding don’t usually have nuts, always check the packaging for any allergens.
Got nut allergies? Be careful with decorations and choose nut-free options. For a no bake chocolate pudding cups that’s dairy-free, use dairy-free pudding, cream cheese, and whipped topping. A few changes make this treat safe and yummy for everyone.
- Gluten-free version: Use gluten-free Oreos or sandwich cookies
- Nut-free version: Avoid decorations containing nuts, use nut-free alternatives
- Dairy-free version: Use dairy-free pudding mix, cream cheese, and whipped topping
This kid-friendly Halloween treats recipe can be adjusted for any diet. Enjoy the festive taste while staying healthy.
Troubleshooting Common Issues
Making quick chilled desserts like our no bake chocolate pudding cups can sometimes go wrong. But don’t worry, we’ve got easy fixes to help your dirt cake turn out right every time.
Texture Problems
If your pudding is too runny, check the pudding mix type. Use instant pudding, not the cook-and-serve kind. Instant mix sets well once chilled. Also, let the dessert chill for 4 hours as instructed. This ensures the pudding gets thick and creamy.
Using homemade whipped cream? Try a stabilized whipped cream recipe to avoid it getting soggy. Make sure all ingredients are room temperature before mixing. This helps the pudding layer mix smoothly.
Setting Solutions
- Use instant pudding mix, not cook-and-serve
- Chill the dessert for the full 4 hours to allow proper setting
- Opt for a stabilized whipped cream recipe if using homemade
- Ensure all ingredients are at room temperature before mixing
Follow these tips for perfectly set no bake chocolate pudding cups. They’re sure to impress your family and friends. Enjoy your spooktacular Halloween treat!
Serving Suggestions and Presentation Ideas
Turn your simple dirt cake into a spooky Halloween masterpiece. Serve it in a clean flower pot or sand pail with a small shovel. For individual servings, use clear plastic cups or Mason jars to show off the chocolate pudding, crushed Oreos, and gummy worms.
Enhance your halloween party food by arranging ghost Milano cookies and candy pumpkins on top. This creates a whimsical graveyard scene. Chilling the cups for at least 30 minutes before serving will give the perfect texture. Offer extra toppings on the side so guests can customize their dirt cake.
For a construction-themed party, top each serving with a mini toy truck or digger. This adds a playful touch. No matter how you present your spooky graveyard cake, it will delight both kids and adults.
The dirt cake is easy to make and can be customized for any occasion. Serve it chilled and enjoy the chocolatey, cookie-filled goodness in a fun, visually appealing way.
Conclusion
This simple dirt cake recipe is a great no-bake Halloween treat. It’s easy to make and tastes amazing. You can change the flavors and decorations to fit any theme or diet.
It’s perfect for school parties, Halloween gatherings, or just a fun family dessert. Kids and adults will love it.
It’s quick to make and can be prepared ahead of time. This makes it great for busy hosts. The crushed Oreos, creamy filling, and spooky decorations make it a hit at Halloween.
So, get ready to wow your guests with this easy dirt cake recipe. It’s all about simplicity, creativity, and taste. Let this no-bake masterpiece be the star of your next Halloween party!