Chocolate Cake with Perfect Chocolate Ganache in 4 Simple Steps
Every baker dreams of making the perfect chocolate cake with ganache. It’s that first bite that makes everyone’s eyes light up. I remember when I first made this recipe. It was like magic – the cake went from ordinary to extraordinary.
Making a chocolate cake with perfect ganache is more than just a recipe. It’s about mastering the art of baking. This guide will show you how to make a dessert that looks like it came from a pro bakery in just four steps.
Whether you’re new to baking or have years of experience, this recipe will wow your guests. The key is using top-notch ingredients and following precise techniques. These steps turn a simple ganache recipe into something truly special.
Table of Contents
Understanding the Magic of Chocolate Cake and Ganache
Making a moist chocolate cake is more than just mixing ingredients. It’s a delicate science that turns simple parts into a bakery-style chocolate cake. This cake delights your senses. Let’s dive into the world of chocolate baking and find out the secrets that make every slice special.
The Science Behind Perfect Chocolate Cake
Baking a remarkable chocolate cake is all about understanding how ingredients work together. Sour cream and vegetable oil are key to making it moist and tender. They ensure your cake stays soft and delicious.
- Sour cream adds richness and prevents dryness
- Vegetable oil helps maintain smooth consistency
- Precise ingredient ratios guarantee optimal results
Why Ganache Makes Everything Better
Ganache turns an ordinary cake into an extraordinary dessert. This rich mix of chocolate and cream gives your cake a glossy, smooth finish. It takes your bakery-style chocolate cake to professional levels.
“Ganache is the secret weapon of professional pastry chefs” – Culinary Institute of America
Essential Ingredients for Success
Choosing high-quality ingredients is crucial for a stunning chocolate cake. Use premium chocolate with 60-70% cocoa content and fresh dairy products. This ensures exceptional flavor and texture.
| Ingredient | Quality Impact |
|---|---|
| Dark Chocolate | Enhances deep flavor profile |
| Heavy Cream | Creates smooth ganache texture |
| Fresh Eggs | Provides structure and richness |
By grasping these basic principles, you’ll be on your way to making a moist chocolate cake. It will rival any professional bakery’s offering.
Essential Equipment and Tools for Baking
To make a chocolate lover’s delight, you need some key kitchen tools. These tools turn your baking into a special experience. Whether you’re new to baking or have been doing it for years, the right tools are crucial for a perfect chocolate cake.
Must-Have Baking Tools
- Mixing Bowls: Opt for nested sets in various sizes
- Measuring Tools: Precise cups and spoons for accuracy
- Cake Pans: Two 6-inch aluminum pans recommended
- Electric Mixer: Stand or hand mixer for smooth batters
- Cooling Racks: Essential for proper cake cooling
Quality tools are the first step to a chocolate lover’s delight. Good equipment means you’ll get great results every time you bake.
“Baking is about precision, and the right tools are your best friends in the kitchen.”
Optional but Helpful Equipment
- Kitchen Scale: For precise ingredient measurements
- Silicone Spatulas: Perfect for scraping bowls clean
- Offset Spatula: Helps in smooth frosting application
- Parchment Paper: Ensures easy cake removal
While professional tools can improve your baking, it’s passion and practice that make a cake delicious.
Equipment Maintenance Tips
Keep your baking tools clean and well-maintained. Wash them well after each use. Store them in a dry place to keep them lasting longer and prevent flavor mix-ups.
Premium Ingredients Selection Guide
Making a rich chocolate dessert begins with picking the best ingredients. The quality of your chocolate cake depends on the right mix of ingredients. These components make the baking process better.
Choosing the Right Chocolate
The core of a great chocolate dessert is its chocolate. Choose chocolates with at least 60% cocoa solids for deep flavor. Experts suggest:
- Dark chocolate with minimum 60% cocoa content
- High-quality unsweetened cocoa powder
- Chocolate with smooth, glossy appearance
The Role of Fresh Dairy Products
Fresh dairy makes a simple cake into a luxurious treat. Use ingredients like:
- Full-fat buttermilk (240 ml)
- Heavy cream with rich butterfat content
- Room temperature eggs for optimal mixing
“Quality ingredients are the foundation of exceptional baking” – Professional Pastry Chef
Dry Ingredients Quality Matters
Your dry ingredients greatly affect the cake’s texture and taste. Choose the best:
- Unbleached all-purpose flour (250 g)
- Fine granulated sugar (400 g)
- Fresh baking powder and baking soda
Pro tip: Sift dry ingredients to remove lumps and ensure even distribution. This makes the batter smoother for your chocolate dessert.
The Secret Role of Coffee in Chocolate Baking
Baking a rich chocolate frosting is more than just using great ingredients. Professional bakers have a secret: coffee can make your chocolate cake amazing. Coffee boosts the chocolate flavor without tasting like coffee itself.

Coffee has special compounds that make chocolate taste deeper. It’s like a flavor booster, not a rival taste. Most bakers use one of two methods:
- Hot brewed coffee (recommended)
- Instant espresso powder
- Decaf coffee for caffeine-sensitive bakers
“Coffee doesn’t overpower chocolate – it makes chocolate taste more like itself.” – Professional Pastry Chef
When making rich chocolate frosting, try these coffee tips:
- Use ½ cup hot coffee in cake batter
- Add 1 tablespoon instant espresso powder
- Make sure coffee is freshly brewed and hot
| Coffee Type | Chocolate Enhancement | Recommended Quantity |
|---|---|---|
| Brewed Coffee | Maximum Flavor Depth | ½ cup |
| Instant Espresso | Concentrated Flavor | 1 tablespoon |
| Decaf Coffee | Flavor Without Caffeine | ½ cup |
The aim is to enhance the flavor subtly. Your frosting should be intensely chocolatey, not coffee-like. Try different coffees to find your ideal mix.
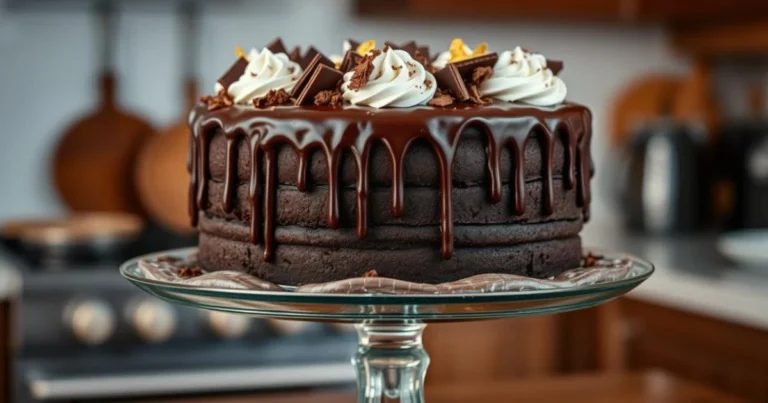
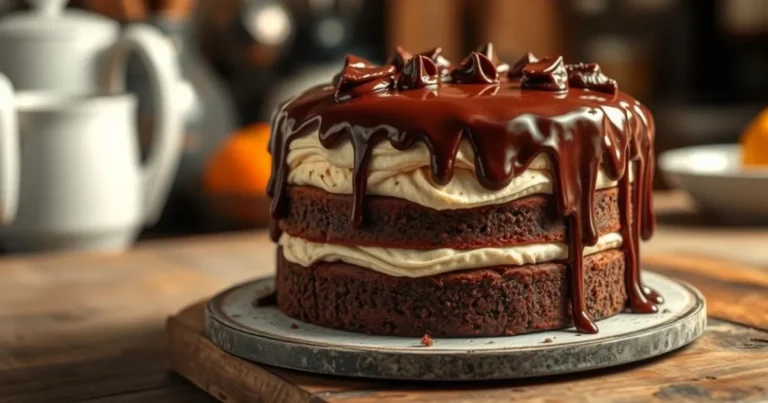
Chocolate Cake with Perfect Chocolate Ganache
Making a delicious chocolate cake with easy chocolate ganache might seem hard. But, with the right steps, you’ll get it done quickly. We’ll show you how to make a cake that looks like it was made by a pro.
Mastering the Cake Batter
The secret to a great chocolate cake is in the batter. Begin by getting all your ingredients ready at room temperature. Use top-notch cocoa powder and mix dry ingredients well to avoid lumps.
- Sift together 1 ½ cups of all-purpose flour
- Add ½ cup unsweetened cocoa powder
- Mix in 1 ½ teaspoons of baking powder
- Include a pinch of salt for balance
Creating Silky Smooth Ganache
An easy chocolate ganache makes your cake amazing. The trick is using great chocolate and a simple method.
- Chop 8 oz of semi-sweet chocolate into small pieces
- Heat 1 cup of heavy cream until just simmering
- Pour hot cream over chocolate
- Let sit for 2-3 minutes, then stir until smooth
Assembly Tips and Techniques
When putting your cake together, be patient. Let your cake cool down before adding the ganache. For a pro look, place the cake on a wire rack and pour the ganache smoothly.
“The difference between a good cake and a great cake is in the details.” – Professional Baker’s Wisdom
Pro tip: If your ganache is too thick, warm it a bit. If it’s too thin, let it cool and thicken on its own. The perfect ganache coats the back of a spoon smoothly.
Temperature Control and Timing

Getting the temperature and timing right is key to making the ultimate chocolate cake. Your cake’s success depends on managing the oven well and timing everything perfectly.
Oven Temperature Guidelines
For the perfect ultimate chocolate indulgence, follow these critical temperature recommendations:
- Conventional ovens: Bake at 350°F (175°C)
- Convection ovens: Bake at 325°F (160°C)
- Dark-coated pans: Lower temperature to 325°F
Preheating and Baking Insights
“Precision in temperature is the secret to a perfect chocolate cake.”
Preheating is key for your ultimate chocolate indulgence. Spend 15-20 minutes warming your oven. This ensures even heat. Remember, ovens can be off by up to 50°F from the set temperature.
| Pan Size | Baking Time |
|---|---|
| 9″ x 13″ pan | 34 minutes |
| 9″ round pans | 28-30 minutes |
| 8″ round pans | 24-26 minutes |
| Cupcakes | 18-20 minutes |
Cooling and Ganache Timing
After baking, let your cake cool for 20 minutes before taking it out of the pan. For ganache, it takes about 10 minutes to thicken. You can chill it for 15 minutes to get it just right for spreading.
Pro tip: Use an instant-read thermometer to check your cake’s internal temperature. A fully baked cake should be between 200°F-210°F. This ensures it’s moist and delicious.
Professional Decorating Techniques
To make your chocolate cake truly stand out, you need to learn professional decorating skills. The right way to apply chocolate ganache can turn a simple dessert into a work of art.
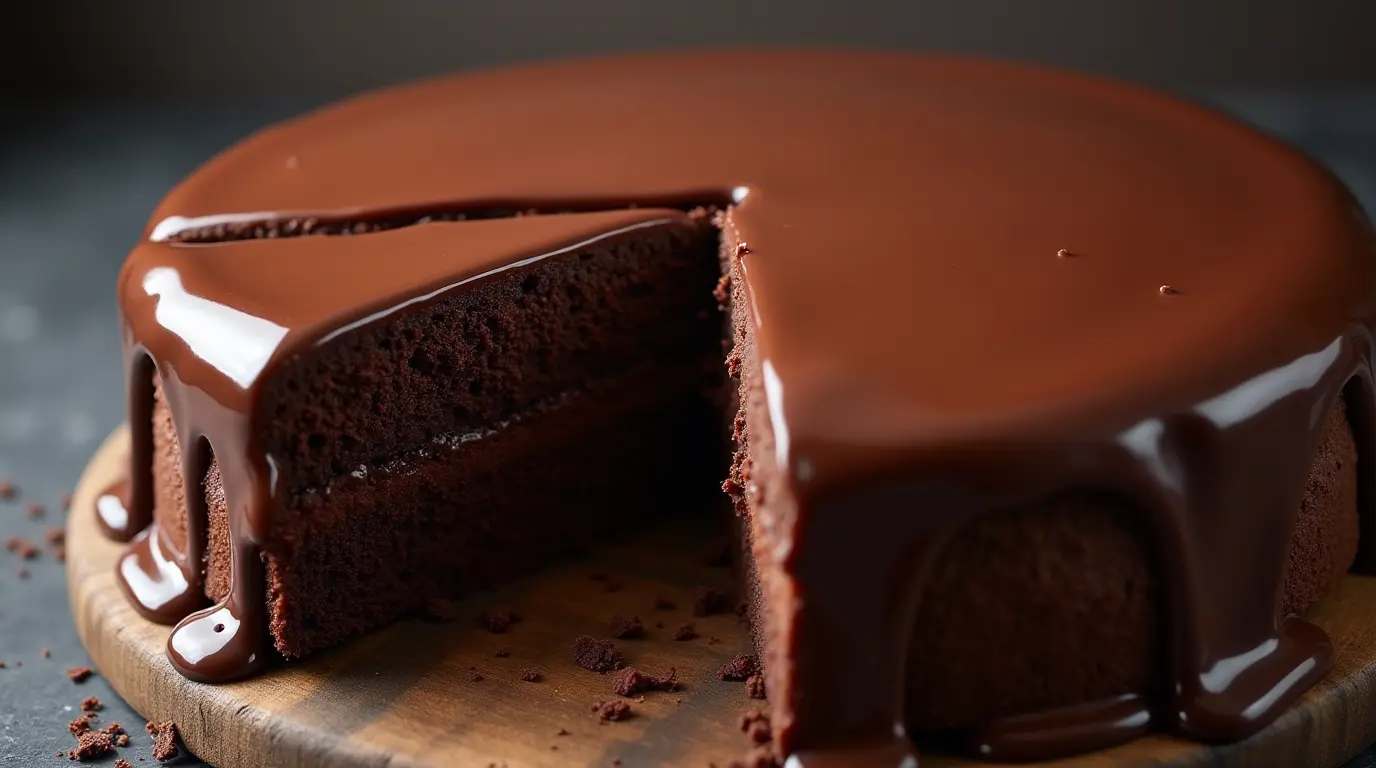
Ganache Pouring Methods
Getting your chocolate cake to look smooth with perfect ganache takes some skill. The key is to get the ganache just right in terms of temperature and mix.
- Pour ganache at 90-95°F for optimal flow
- Use a steady circular motion for even coverage
- Allow ganache to drip naturally over cake edges
Creating Beautiful Finishes
Adding texture and technique can make your cake look amazing. Professional bakers use different methods to get stunning results:
- Mirror glaze technique for ultra-smooth surface
- Rustic drip effect for artistic presentation
- Textured swirl patterns using offset spatula
Garnishing Ideas
Take your chocolate ganache to the next level with creative garnishes. These add to the rich chocolate taste:
| Garnish Type | Visual Impact | Flavor Compatibility |
|---|---|---|
| Chocolate shavings | Elegant | Intense chocolate |
| Fresh berries | Colorful | Tart contrast |
| Toasted nuts | Textural | Nutty undertones |
“The secret to a perfect chocolate cake is not just in the baking, but in the art of decoration.” – Professional Pastry Chef
Remember, the more you practice, the better you’ll get at decorating your chocolate cake with perfect chocolate ganache!
Storage and Serving Guidelines

Keeping your homemade cake fresh and delicious is key. It’s all about the right storage methods. This way, your cake stays moist and flavorful.
For short-term storage, room temperature is best. You can keep your cake for up to 3 days at room temperature. Use a cake dome or wrap it tightly with plastic wrap to keep moisture in.
Refrigeration Strategies
Refrigeration can be tricky with chocolate cakes. It helps keep the cake fresh longer but might dry out the frosting. In warmer places, it’s needed to stop the cake from spoiling.
- Store in an airtight container
- Keep away from strong-smelling foods
- Let cake sit at room temperature for 30 minutes before serving
Freezing for Long-Term Preservation
Freezing is great for longer storage. Wrap each cake slice or the whole cake in plastic wrap and foil. Frozen cakes stay good for up to 3 months.
“A well-stored cake is a delicious cake waiting to be enjoyed!” – Baking Enthusiasts
Serving Recommendations
For the best taste, take your cake out of the fridge or freezer 30-45 minutes before serving. This lets the frosting soften and the flavors come out.
- Slice with a clean, warm knife
- Serve at room temperature
- Garnish with fresh berries or chocolate curls
Pro tip: Always handle your cake gently to preserve its beautiful appearance and delicate texture.
Troubleshooting Common Issues
Making the perfect chocolate ganache can be tough. Even skilled bakers face problems that can ruin their desserts. But, with the right methods, you can solve most baking issues.
Ganache Consistency Problems
Many things can go wrong with your chocolate ganache. Knowing what causes these problems helps you make it smooth and silky every time.
- Lumpy Ganache: Caused by rapid temperature changes or improper mixing
- Thin Ganache: Results from incorrect chocolate-to-cream ratio
- Separated Ganache: Often happens due to overheating or vigorous whisking
Solving Common Chocolate Ganache Recipe Challenges
| Problem | Solution |
|---|---|
| Ganache is too runny | Add more chopped chocolate or cool longer |
| Ganache appears grainy | Reheat gently to 92°F and whisk carefully |
| Ganache separates | Use room temperature ingredients and gentle mixing |
Experts say to use a 1:1 ratio of chocolate to cream for most recipes. For white chocolate, use a 3:1 ratio to get the right consistency.
“Patience and precision are the secret ingredients in any successful chocolate ganache recipe.” – Professional Pastry Chef
Remember, the more you practice, the better you’ll get. Every batch of chocolate ganache is a chance to improve your skills.
Expert Tips for Perfect Results Every Time
Making a bakery-style chocolate cake is more than just a recipe. Professional bakers say it’s all about precision and technique. These things make your dessert truly special.
Mastering Ingredient Measurements
Being accurate with your ingredients is crucial. Bakers suggest using a kitchen scale for exact measurements. This way, you get the same great results every time.
- Use a digital kitchen scale for dry ingredients
- Measure flour by gently spooning into the measuring cup
- Level off dry ingredients with a straight edge
Temperature and Timing Secrets
The temperature of your ingredients affects the cake’s texture. Using room temperature ingredients makes the batter smoother and more even.
- Remove eggs and butter from refrigerator 30-45 minutes before baking
- Use warm (not hot) ingredients for optimal mixing
- Preheat oven exactly 15 minutes before baking
Professional Finishing Touches
Take your chocolate cake to the next level with these tips:
- Sift dry ingredients to remove lumps
- Tap cake pan to release air bubbles
- Use a turntable for smooth frosting application
“Baking is an art, but precision is the secret ingredient to perfection.” – Professional Baker’s Wisdom

Making Ahead and Freezing Instructions
Preparing a moist chocolate cake in advance is a lifesaver for busy bakers. With the right steps, you can enjoy your dessert ahead of time without losing quality.
Cake Layer Preparation and Freezing
Here’s how to freeze your moist chocolate cake layers perfectly:
- Bake cake layers completely and let them cool
- Wrap each layer in plastic wrap
- Add an extra layer of aluminum foil for extra protection
- Freeze the layers for up to 3 months
Freezing and Storage Guidelines
To keep your chocolate cake moist, follow these storage tips:
| Item | Freezing Duration | Storage Method |
|---|---|---|
| Cake Layers | Up to 3 months | Double-wrapped in plastic and foil |
| Chocolate Ganache | Up to 2 months | Airtight container |
Thawing Instructions
When you’re ready to enjoy your cake, thawing is key:
- Take the cake layers out of the freezer
- Thaw overnight at room temperature
- Unwrap completely before assembling
- Let the layers come to room temperature
“Freezing doesn’t compromise flavor—it preserves the delightful moisture of your chocolate cake when done correctly.” – Professional Baker’s Tip
Pro tip: Always label your frozen cake layers with the date to track freshness and ensure optimal taste!
Conclusion
Making this decadent chocolate dessert is more than a recipe. It’s about creating an experience that pleases every sense. You’ve learned baking techniques, picked the right ingredients, and mastered ganache. Now, you can turn a simple cake into a stunning masterpiece.
This chocolate cake serves 12 people, making it perfect for any gathering. You’ve learned how to choose the best cocoa powder and how olive oil adds moisture. These skills take your baking to a professional level.
Baking is all about practice and passion. Every time you make this dessert, you’ll get better and try new things. You’ll make memories with a dessert that combines tradition and innovation.
So, get your oven ready, collect your ingredients, and enjoy the process. Your chocolate cake adventure is just beginning. Delicious moments are waiting for you!