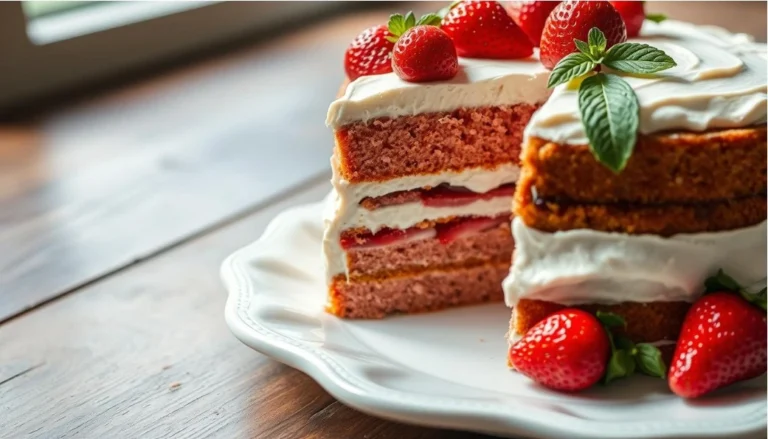
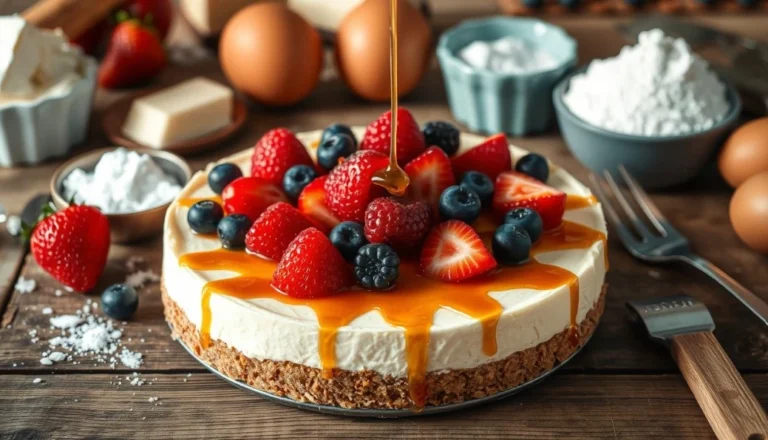
How to Make the Ultimate Oreo Bliss Cheesecake
Every home baker dreams of making a dessert that becomes a family legend. The Oreo bliss cheesecake is more than a recipe. It’s a journey that turns simple ingredients into a rich dessert everyone wants more of.
Imagine biting into a creamy cheesecake filled with Oreo cookies. Each bite is a mix of smooth cream cheese and crunchy chocolate. It’s not just a dessert; it’s a way to share deliciousness with others.
Whether it’s for a special event or just because, this Oreo bliss cheesecake recipe will make you a better baker. It will impress even the pickiest dessert lovers.
Table of Contents
Essential Ingredients for Your Decadent Oreo Cheesecake
To make the ultimate creamy cheesecake, you need the right ingredients. Your Oreo Bliss Cheesecake will amaze with its rich flavors and smooth texture.
Cookie Crust Components
The base of your chocolate cookie crust is premium Oreo crumbs. You’ll need about 23 whole Oreos for the perfect base. Here’s what you’ll need:
- 1 1/2 cups of Oreo cookie crumbs
- 1/4 cup melted butter
- Pinch of salt (optional)
Creamy Filling Ingredients
The heart of your cheesecake is in the high-quality ingredients. They make it smooth and decadent:
- 24 ounces full-fat cream cheese (1.5 pounds)
- 1 cup granulated sugar
- 5 large eggs
- 1-2 teaspoons pure vanilla extract
- 3 tablespoons all-purpose flour
Topping Options
Make your cheesecake even better with these garnishes:
- Crushed Oreo cookies
- Whipped cream
- Chocolate ganache
- Additional whole Oreos
“The secret to an extraordinary cheesecake lies in using premium ingredients and treating them with care.”
Pro tip: Always use room temperature ingredients. This ensures a smooth, crack-free cheesecake that will wow dessert lovers.
Kitchen Tools and Equipment Needed
Making an amazing Oreo Bliss Cheesecake needs some key kitchen tools. Whether you’re making a simple no-bake version or a traditional baked one, the right tools are crucial.
- 9-inch springform pan – critical for easy cake removal
- Electric mixer – for smooth, creamy filling
- Large mixing bowls – for ingredient preparation
- Measuring cups and spoons – precision is key
- Food processor – perfect for crushing Oreo cookies
- Rubber spatula – helps scrape every delicious bit
- Parchment paper – prevents sticking
Professional bakers say quality tools make a great recipe even better. Your 9-inch springform pan is key. It ensures clean slices and easy serving.
“The right tools can turn anyone into a dessert master!” – Pastry Chef Recommendation
If you’re into easy no-bake recipes, you’ll still need these tools. The food processor and electric mixer are your go-to for a creamy, tasty cheesecake without baking.
Preparing the Perfect Oreo Cookie Crust
Making a great chocolate cookie crust is key to a memorable Oreo cheesecake. The right steps can turn your dessert into something amazing. Your crust will be the crunchy, tasty base for creamy cheesecake.
Crushing Techniques for Optimal Texture
There are two main ways to get the perfect oreo crumbs:
- Food Processor Method: Pulse Oreo cookies until they become fine, uniform crumbs
- Rolling Pin Technique: Place cookies in a sealed plastic bag and crush manually for a rustic texture
Precise Crust Pressing Techniques
To get the perfect chocolate cookie crust, you need to press it right. Here are some tips for a smooth, compact base:
- Use the bottom of a measuring cup or glass to press crumbs evenly
- Apply moderate, consistent pressure across the entire pan
- Create a uniform thickness of about 1/4 inch
“A perfectly pressed crust is the secret weapon of professional bakers.” – Pastry Chef Recommendation
Oreo Crust Ingredient Proportions
| Pan Size | Oreo Cookies | Melted Butter |
|---|---|---|
| 8-9 inch | 25 cookies | 4 tablespoons |
| 10 inch | 30 cookies | 5 tablespoons |
| 9×13 inch | 38 cookies | 6 tablespoons |
Pro tip: Chill your prepared crust for at least 15 minutes before adding the filling to ensure a crisp, stable base.
Creating the Ultimate Oreo Bliss Cheesecake Filling
Making a rich Oreo Bliss Cheesecake filling needs care and love. Start by picking the right ingredients and learning how to mix them well.
Essential Ingredients for the Perfect Filling
- 500 grams dairy-free cream cheese
- 200 grams soaked cashew nuts
- 60 grams coconut cream
- 100 grams powdered sugar
- 300 grams Oreo cookies (crushed)
For a creamy cheesecake, make sure all ingredients are at room temperature. This ensures a smooth batter that’s both rich and indulgent.
“The magic of a perfect cheesecake lies in the details of its preparation.” – Pastry Chef Wisdom
Mixing Technique
- Blend cashew nuts until completely smooth
- Add dairy-free cream cheese and mix thoroughly
- Incorporate coconut cream gradually
- Fold in crushed Oreo cookies
| Ingredient | Quantity | Purpose |
|---|---|---|
| Dairy-free Cream Cheese | 500g | Base of filling |
| Cashew Nuts | 200g | Adds creaminess |
| Oreo Cookies | 300g | Flavor and texture |
Pro tip: Avoid overmixing to prevent a dense, heavy filling. Gentle folding preserves the light, creamy texture that makes this Oreo Bliss Cheesecake truly spectacular.
Mastering the Mixing Process
Making a rich Oreo Bliss Cheesecake needs careful mixing. Whether it’s a no-bake or baked version, how you mix matters a lot.
Temperature Guidelines for Ingredients
Start with the right ingredient temperatures for cheesecake success. Keep them between 70–75°F (21–24°C). This helps mix smoothly and keeps the texture creamy.
- Cream cheese: Remove from refrigerator 1 hour before mixing
- Eggs: Let sit at room temperature for 30 minutes
- Sour cream: Allow to warm slightly for easier incorporation
Proper Mixing Speeds and Times
Mixing the cheesecake batter needs focus on speed and time. Begin with room temperature cream cheese and beat until it’s smooth.
- Low Speed: Incorporate sugar gradually
- Medium Speed: Add vanilla and mix until combined
- Low Speed: Add eggs one at a time, mixing minimally
“The key to a perfect cheesecake is gentle mixing and avoiding overmixing.”
For a no-bake recipe, use gentle mixing for a light, rich texture. Aim for a smooth, creamy filling without too much air.
Baking Techniques for a Crack-Free Cheesecake
Making an Oreo Bliss Cheesecake is all about precision. You want a rich texture without any cracks. Cracks can mess up the smooth look of your dessert.
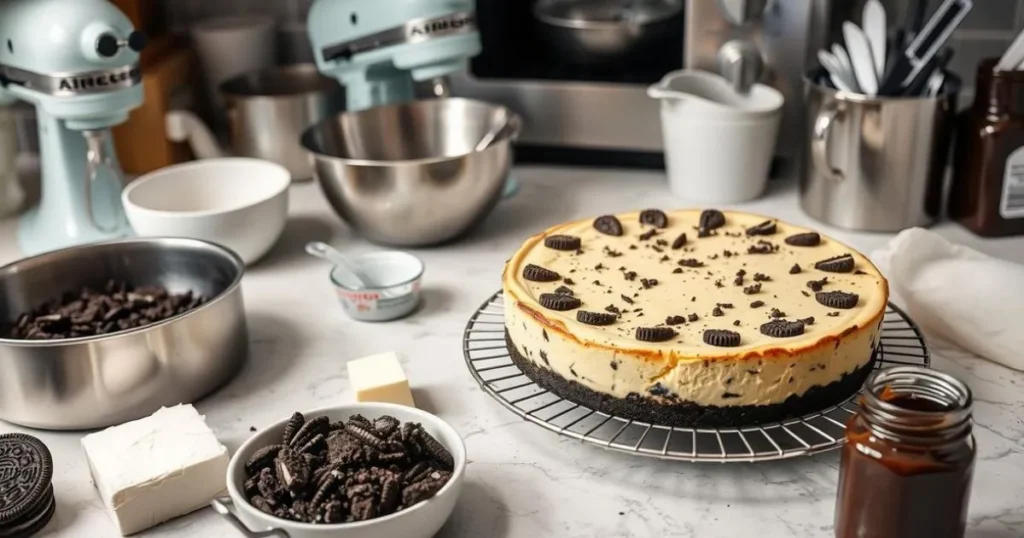
A beautifully arranged kitchen countertop featuring essential baking tools for making Oreo cheesecake, including a springform pan, mixing bowls, an electric mixer, measuring cups, and spatulas. In the background, an oven is visible with a perfectly baked, crack-free Oreo cheesecake cooling on a wire rack. Surrounding the scene are crushed Oreos in a bowl, a block of cream cheese, and a jar of chocolate sauce, all set in a warm, inviting atmosphere with soft lighting.
The key to a perfect cheesecake is in the baking. Start by heating your oven to 325°F. This gentle heat helps even out the baking. Using a water bath is also key. It stops cracks and makes the cheesecake smooth.
Key Baking Strategies
- Use a water bath with 2 quarts of water
- Wrap the pan in double layers of foil to prevent water leaks
- Bake for 1 to 1.5 hours
Look for these signs of a well-baked cheesecake:
- Outer ring slightly puffed
- Center jiggles like barely set Jell-O
- No visible browning on top
“Patience is the key to a crack-free cheesecake.” – Pastry Chef Wisdom
After baking, let the cheesecake cool slowly. Keep the oven door slightly open for about 1 hour. This slow cooling helps avoid cracks.
| Baking Parameter | Recommended Setting |
|---|---|
| Oven Temperature | 325°F |
| Baking Time | 1 to 1.5 hours |
| Cooling in Oven | 1 hour with door cracked |
| Minimum Chilling Time | 4 hours (ideally overnight) |
Creating a decadent dessert takes time. Cool your cheesecake in the fridge for at least 4 hours. Or, even better, let it chill overnight. This ensures a rich and indulgent cheesecake.
Cooling and Setting Guidelines
Making the perfect creamy cheesecake takes patience and careful cooling. Your Oreo Bliss Cheesecake needs special care to impress your guests.
After baking, your cheesecake goes through a critical phase. It needs two stages for a smooth, crack-free dessert:
- Room Temperature Cooling
- Refrigeration Setting
Room Temperature Cooling Method
Take your cheesecake out of the oven and let it cool at room temperature. This slow cooling prevents cracks in your creamy cheesecake.
Refrigeration Timeline
Refrigeration is key for the perfect texture. Here are the cooling guidelines:
- Cool at room temperature for 1 hour
- Refrigerate for at least 4 hours
- Overnight chilling is best
Pro tip: Run a knife around the pan’s rim before refrigerating. This helps prevent cracking and makes serving easier.
| Cooling Stage | Duration | Purpose |
|---|---|---|
| Room Temperature | 1 hour | Gradual cooling |
| Refrigeration | 4-8 hours | Set and firm texture |
“Patience is the secret ingredient in creating the most decadent cheesecake.”
By following these guidelines, you’ll make your Oreo Bliss Cheesecake a professional-quality dessert. It will be the star of any gathering.
Storage and Freezing Tips

A beautifully arranged collection of Oreo cheesecake bars stored in a modern refrigerator, showcasing clear airtight containers and vibrant Oreo cookie crumbs scattered around, with a subtle light illuminating the creamy texture of the cheesecake, and an inviting atmosphere that emphasizes freshness and indulgence.
Keeping your oreo cheesecake bars fresh is key. This way, you can enjoy them for days or even months. Proper storage is essential.
Refrigeration Guidelines
Here’s how to store your cheesecake bars in the fridge:
- Cover the cheesecake tightly with plastic wrap
- Store in an airtight container
- Refrigerate for up to 5 days
- Keep at a consistent temperature below 40°F
Freezing Techniques
Freezing your cheesecake bars is a great idea. It makes them even more convenient:
- Wrap individual bars or the entire cheesecake in plastic wrap
- Add a layer of aluminum foil for extra protection
- Freeze for up to 3 months
- Thaw overnight in the refrigerator before serving
“Proper storage is the secret to keeping your cheesecake bars as delicious as the moment they were made.” – Baking Experts
Pro tip: Let the cheesecake thaw at room temperature for 15-20 minutes before serving. This will help it regain its creamy texture.
Conclusion
Making the perfect Oreo bliss cheesecake is more than just a recipe. It’s about turning simple ingredients into a rich, decadent treat. This guide will help you create a cheesecake with a delightful Oreo crunch. It will boost your baking skills.
This guide shows that making an amazing dessert is easy. You can choose to bake it or try a no-bake version. The secret is to be precise and passionate. This cheesecake recipe can be adjusted to fit any diet or taste.
Baking is both art and science. Every step, from making the crust to mixing the filling, is important. With practice, you’ll make a dessert that looks and tastes amazing. Enjoy the journey and relish every bite of your homemade Oreo cheesecake.
Feel free to make this recipe your own. Try new things, share with friends, and be proud of your baking. Your Oreo bliss cheesecake will be a hit at any gathering. It will bring joy and sweet memories.
FAQ
Can I make this Oreo Bliss Cheesecake ahead of time?
Absolutely! You can make this Oreo Bliss Cheesecake ahead of time. It can stay in the fridge for up to 5 days. Or, you can freeze it for up to 3 months. Wrap it tightly in plastic wrap and foil for freezing.
Is this recipe suitable for a no-bake version?
Yes, you can make a no-bake Oreo cheesecake. Just skip baking and use gelatin or more heavy cream to set it in the fridge. The cookie crust and Oreo crumbs stay the same.
How do I prevent cracks in my cheesecake?
To avoid cracks, make sure your ingredients are room temperature. Don’t overmix and use a water bath while baking. Cool the cheesecake slowly. Run a knife around the pan’s edge after baking and cool it slowly in the oven with the door a bit open.
Can I use reduced-fat cream cheese?
You can use reduced-fat cream cheese, but it might change the cheesecake’s texture and taste. Full-fat cream cheese gives the best creamy texture and rich flavor for your Oreo Bliss Cheesecake.
How many Oreos should I use in the recipe?
You’ll need about 25-30 Oreo cookies for the crust and filling. This gives you a good cookie crumb base and plenty of cookie chunks in the cheesecake.
Can I make this recipe gluten-free?
Yes! Use gluten-free Oreo-style cookies for the crust and filling. Make sure all other ingredients are gluten-free for a gluten-free dessert.
How long does the cheesecake need to set in the refrigerator?
Refrigerate your Oreo Bliss Cheesecake for at least 4 hours, but overnight is best. This lets it set completely and get its creamy texture.
Can I add extra toppings to my cheesecake?
Definitely! You can add whipped cream, chocolate drizzle, crushed Oreo crumbs, or chocolate shavings. These toppings can make your cheesecake look and taste even better.