No-Bake Funfetti Oreo Icebox Cake: Easy & Delicious Dessert
Every slice of this no-bake funfetti Oreo icebox cake brings back summer memories. Growing up, I watched my grandmother make cool, creamy desserts without using the oven. These desserts brought our family together.
This dessert is a mix of simplicity and flavor. It has the crunch of Oreo cookies, the fun of funfetti, and a whipped cream that’s like a cloud. It’s more than a treat; it’s a way to connect generations through food.
This cake is perfect for hot summer days. It’s easy to make but tastes amazing. It’s great for family gatherings or when you just want something sweet.
Table of Contents
The History and Charm of Classic Icebox Cakes
Imagine a dessert that cools you down on hot summer days without using an oven. Icebox cakes have been a favorite for many years, loved by home bakers everywhere. They are a smart choice for families looking for a cool treat when it’s hot outside.
The story of icebox cakes starts in Midwestern kitchens. Home cooks there came up with no-bake desserts that were easy to make. These desserts became a hit at summer parties, offering a sweet break from the heat.
Origins in Midwest Kitchens
In the early 1900s, Midwestern families found a clever way to make desserts. Since they didn’t have air conditioning, using the oven was too hard. Icebox cakes were the answer, needing just a few ingredients:
- Crisp cookies
- Fluffy whipped cream
- Minimal preparation time
Evolution of No-Bake Desserts
As technology improved, icebox cakes got more exciting. Bakers started using funfetti mixes, different chocolates, and new flavors. This made these simple desserts even more special.
Why Icebox Cakes Remain Popular Today
“A dessert that requires no baking and delivers maximum flavor? That’s pure magic!” – Vintage Cooking Magazine
Today, home bakers still love icebox cakes for:
- Quick preparation
- No-heat cooking method
- Versatile flavor options
- Crowd-pleasing presentation
These classic summer treats are more than just desserts. They connect us to family traditions and simple joys in cooking.
Essential Ingredients for Your No-Bake Funfetti Oreo Icebox Cake
Starting your no-bake Funfetti Oreo icebox cake journey is all about picking the right ingredients. You’ll need the best parts to make a treat that will wow everyone. It’s time to gather what you need for a delightful dessert.
Key Ingredients List
- 2 packages of Nabisco Oreo cookies (birthday cake flavor)
- 2/3 cup whole milk
- 1¾ cups heavy whipping cream
- 1/2 cup confectioners’ sugar
- 3/4 cup dry white cake mix
- 8 oz cream cheese
- 2/3 cup granulated sugar
- 2 teaspoons vanilla extract
- 3/4 cup rainbow sprinkles
Choosing top-notch ingredients is key for your dessert. Nabisco Oreo cookies give a creamy base. Rainbow sprinkles add a fun touch to your cake.
“The secret to an amazing dessert is using the freshest ingredients possible.” – Pastry Chef Recommendation
What you pick affects the cake’s taste and feel. Each item is important for a tasty and pretty no-bake dessert.
| Ingredient Category | Quantity | Purpose |
|---|---|---|
| Cookies | 2 packages | Base and layering |
| Whipping Cream | 1¾ cups | Mousse creation |
| Sprinkles | 3/4 cup | Decorative element |
| Cream Cheese | 8 oz | Texture and richness |
Pro tip: Always use fresh ingredients and measure precisely to ensure the best results in your no-bake Funfetti Oreo icebox cake.
Kitchen Tools and Equipment Needed
Making a tasty refrigerator cake needs the right tools. Projects like the no-bake Funfetti Oreo icebox cake are easy with the right equipment. Let’s look at the key tools for making this yummy dessert.
Essential Utensils for Your Icebox Cake
To start your baking journey, you’ll need some basic tools:
- 9×13 inch rectangular baking dish
- Large mixing bowl
- Electric hand mixer or stand mixer
- Rubber spatula
- Measuring cups and spoons
- Whisk
Optional Equipment for Professional Results
These extra tools can make your cakes even better:
- Offset spatula for smooth layering
- Pastry bag with decorative tips
- Digital kitchen scale for precise measurements
- Rotating cake stand
Storage and Wrapping Essentials
Keeping your icebox cake fresh is key:
| Storage Item | Purpose |
|---|---|
| Plastic wrap | Prevent moisture loss and freezer burn |
| Airtight container | Protect cake from absorbing other refrigerator odors |
| Aluminum foil | Additional protection for longer storage |
“The right tools can transform a simple recipe into a memorable culinary experience.” – Pastry Chef Anonymous
Pro tip: Make sure your tools are clean and dry before baking. This keeps everything hygienic and flavorful.
Step-by-Step Assembly Instructions
Making this no-bake funfetti oreo icebox cake is easier than you think. We’ll guide you through each step. This way, you’ll get a delicious dessert every time.
- Prepare Your Workspace
- Gather all ingredients and tools
- Line a 9×13 inch baking dish with parchment paper
- Ensure your refrigerator has adequate space
- Create the Whipped Cream Base
- Whip heavy cream until stiff peaks form
- Gently fold in powdered sugar and vanilla extract
- Mix in funfetti sprinkles for colorful texture
- Layer the Oreos
- Briefly dip each Oreo in milk (2-3 seconds)
- Arrange first layer of cookies in baking dish
- Spread whipped cream mixture evenly
- Repeat and Refrigerate
- Continue layering Oreos and cream
- Aim for 3-4 total layers
- Top with extra sprinkles
Your no-bake funfetti oreo icebox cake needs about 4 hours in the fridge. This time lets the layers set and flavors mix well.
“The magic of this dessert is in its simplicity and the joy of no-bake preparation!” – Dessert Enthusiasts
Pro tip: Cover the dish with plastic wrap before refrigerating. This stops flavors from other foods from getting in.
Creating the Perfect Whipped Cream Mixture
Making the perfect whipped cream is key for cool whip desserts. It’s all about the right mix of ingredients and techniques. These steps turn simple cream into a fluffy, luxurious treat for your sprinkles desserts.
Whipping Technique Tips
Begin with cold heavy whipping cream from the fridge. Chill a metal mixing bowl to keep the cream cool. Use an electric mixer on medium-high speed for the best texture and volume.
- Chill your mixing bowl and whisk for 15 minutes before starting
- Use heavy whipping cream with at least 36% fat content
- Whip until soft peaks form, but stop before the cream becomes grainy
Incorporating Funfetti Mix
The magic happens when you mix the funfetti mix into the whipped cream. Gently fold the dry cake mix into the cream with a spatula. This ensures even color and flavor.
| Ingredient | Quantity | Purpose |
|---|---|---|
| Heavy Whipping Cream | 3 cups | Base for creamy texture |
| Powdered Sugar | 1/2 cup | Adds sweetness and stability |
| Funfetti Cake Mix | 1 package | Provides flavor and color |
Achieving the Perfect Consistency
The whipped cream should be light and airy but still hold its shape. Whip until soft peaks form, then fold in the dry ingredients. Stop mixing once the funfetti mix is evenly spread to avoid deflating the cream.
“The key to an amazing whipped cream is patience and gentle handling.” – Pastry Chef Tip
Pro tip: Add rainbow sprinkles just before the final fold. This ensures they’re spread evenly throughout your cool whip dessert. It makes for a festive and colorful treat that will wow everyone!
Layering Techniques for Professional Results
Making the perfect refrigerator cake needs precision and care. Working with Nabisco Oreo cookies and whipped cream can turn a simple dessert into a stunning masterpiece.
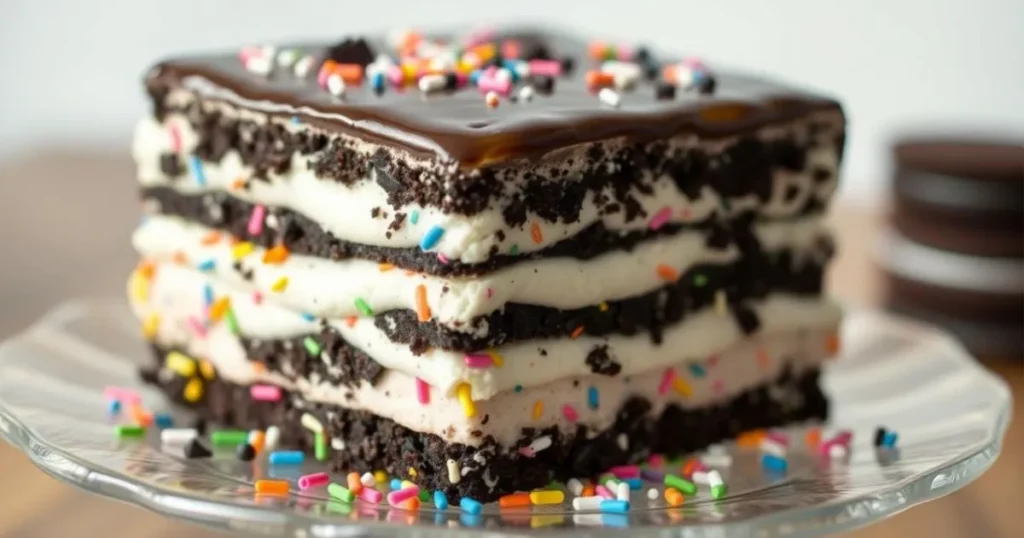
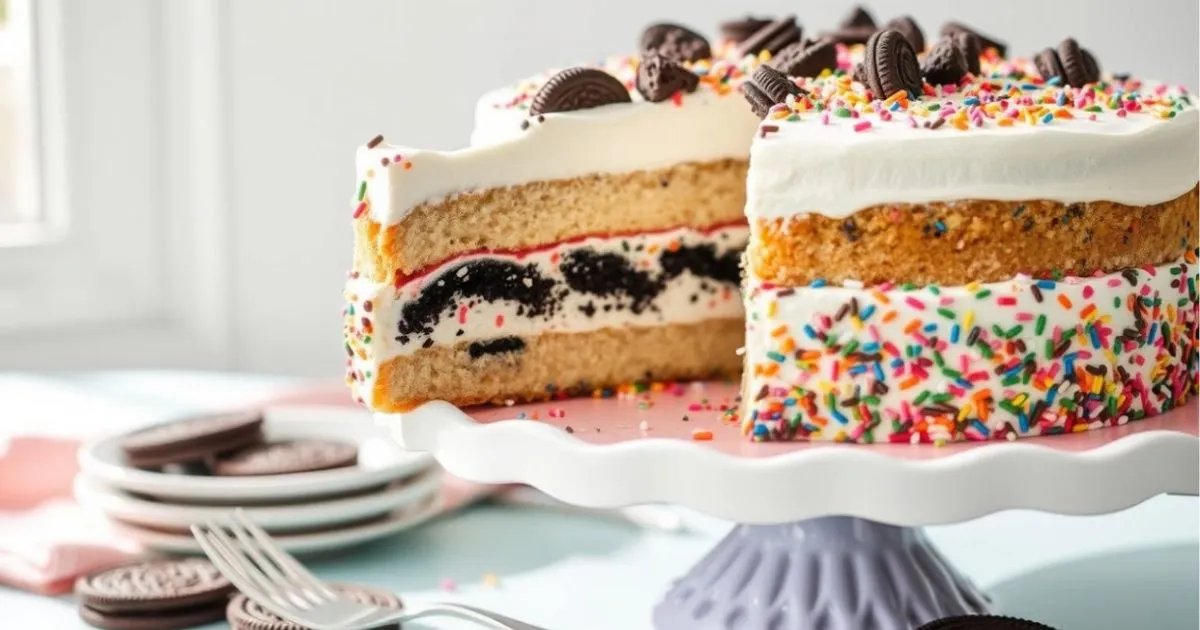
A beautifully layered no-bake funfetti Oreo icebox cake, showcasing intricate layers of crushed Oreos, colorful funfetti cream, and a glossy topping. The cake is displayed on a delicate glass plate, with a close-up view capturing the contrasting textures of the soft cream and crunchy Oreo layers. Vibrant sprinkles are artfully scattered around the base, with subtle light reflecting off the creamy surface, creating an enticing, mouth-watering appearance.
Professional bakers say following a strategic approach is key for perfect layers. The goal is to be consistent and place each ingredient carefully.
- Start with a flat, clean surface
- Use a spatula for even cream distribution
- Align Nabisco Oreo cookies carefully
- Maintain consistent layer thickness
Your layering strategy affects the cake’s texture and look. When spreading whipped cream, use smooth motions for even coverage.
“Perfect layers are the secret to an impressive refrigerator cake” – Professional Pastry Chef
Here are important layering measurements for your Nabisco Oreo cookie icebox cake:
| Layer Component | Recommended Thickness | Technique |
|---|---|---|
| Whipped Cream | 1/4 inch | Smooth, even spread |
| Oreo Cookies | Single layer | Minimal overlap |
| Total Layer Height | 3-4 inches | Consistent build-up |
Pro tip: Refrigerate between layers to help set the structure and enhance flavor melding.
Mastering these layering techniques will make your refrigerator cake look and taste like a pro’s work.
Creative Decoration Ideas with Sprinkles and Toppings
Turn your sprinkles desserts into stunning party foods with creative decoration. The right garnishes can make your No-Bake Funfetti Oreo Icebox Cake unforgettable.
Seasonal Sprinkle Combinations
Customize your icebox cake with seasonal sprinkles. They capture the spirit of different celebrations:
- Summer parties: Bright, tropical-colored sprinkles
- Winter holidays: Red and green festive blends
- Birthday celebrations: Multicolored rainbow sprinkles
- Valentine’s Day: Pink and red heart-shaped sprinkles
Garnish Options for Special Occasions
Elevate your dessert with professional garnishing techniques:
- Use chocolate drizzle for an elegant touch
- Create decorative patterns with different sprinkle sizes
- Add crushed Oreo cookies for texture
- Incorporate edible glitter for extra sparkle
Professional Presentation Tips
Professional bakers know visual appeal is key. Select sprinkles desserts that complement your color scheme. Arrange toppings to create eye-catching designs that will wow your guests.
“The secret to amazing party foods is in the details of decoration.” – Professional Pastry Chef
Storage Tips and Make-Ahead Instructions
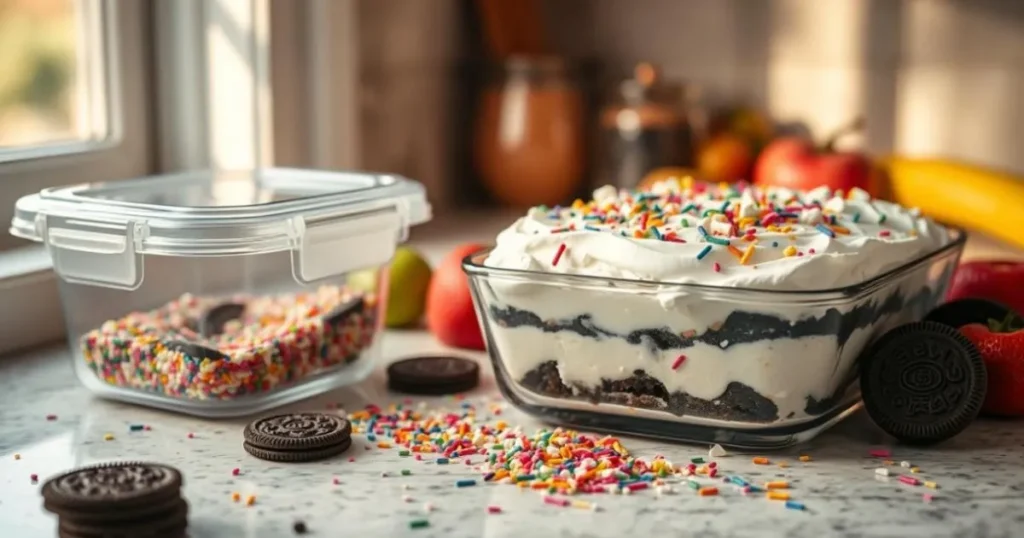
A beautifully styled kitchen counter featuring a No-Bake Funfetti Oreo Icebox Cake in a glass dish, surrounded by colorful sprinkles, Oreo cookie crumbs, and fresh fruit. The cake is layered with whipped cream and vibrant confetti-like sprinkles, sitting next to an airtight container for storage. Soft natural light streams in from a nearby window, illuminating the cake and creating a warm, inviting atmosphere.
When making no-bake funfetti Oreo icebox cake, storing it right is key. It keeps the flavors and texture at their best. Follow these steps to keep your cake delicious.
Here are essential storage guidelines for your delectable treat:
- Chilling Time: Refrigerate for 4-6 hours before serving
- Maximum Refrigeration: Keeps fresh for up to 5 days
- Recommended Storage Temperature: Between 35-40°F
To keep your icebox cake fresh, follow these expert tips:
- Always cover the cake tightly with plastic wrap or aluminum foil
- Store in the coldest part of your refrigerator
- Avoid placing near strong-smelling foods
“The secret to perfect refrigerator cakes is patience and proper refrigeration.” – Pastry Chef Recommendation
Pro tip for make-ahead preparation: You can assemble your refrigerator cake up to 2 days in advance. This makes it perfect for parties and special events.
| Storage Method | Duration |
|---|---|
| Refrigerator | 4-5 days |
| Freezer | 2-3 months |
When ready to serve, take the cake out of the fridge 15-20 minutes before. This lets it soften a bit. Enjoy your tasty, easy dessert!
Serving Suggestions and Pairing Options
Your no-bake funfetti Oreo icebox cake becomes a true adventure with the right pairings. These summer treats are at their best when paired with thoughtful accompaniments. These pairings enhance their flavor.
For birthday cakes with a twist, consider these delightful serving recommendations:
- Pair with vanilla bean ice cream for a classic cool combination
- Serve alongside a fresh fruit salad for added brightness
- Complement with cold milk or freshly brewed coffee
Exploring unexpected flavor combinations can make your dessert memorable. Think about matching your icebox cake with classic Midwestern dishes like barbecued ribs or a crisp corn and tomato salad.
| Beverage Pairing | Flavor Complement |
|---|---|
| Cold Milk | Classic Oreo Cookie Taste |
| Iced Coffee | Rich, Robust Undertones |
| Sparkling Lemonade | Bright, Refreshing Contrast |
“The perfect dessert is not just about taste, but about creating an experience that delights all senses.” – Culinary Expert
Pro tip: Chill your serving plates beforehand. This keeps your icebox cake at the perfect temperature. Each bite will be deliciously cool and creamy.
Conclusion
Your journey to make the perfect no-bake funfetti Oreo icebox cake is just starting. This tasty party food lets you get creative in the kitchen. With only 20 minutes of prep and a quick chill, you’ve found a dessert that’s easy and delicious.
This no-bake funfetti Oreo icebox cake is perfect for any event. It’s great for birthdays, summer parties, or just when you want something sweet. The mix of Oreo cookies, funfetti, and creamy layers makes it both beautiful and yummy.
Cooking is all about trying new things and having fun. Feel free to make this recipe your own. Try different cookies, change up the sprinkles, or adjust the layers. Your no-bake funfetti Oreo icebox cake is a blank canvas for your creativity.
When you share this dessert with loved ones, it brings joy. Keep trying new things, keep baking, and enjoy every moment of it.
FAQ
How long can I store the No-Bake Funfetti Oreo Icebox Cake?
Store your icebox cake in the fridge for 3-4 days. Use plastic wrap or an airtight container. The cookies will soften, making it cake-like.
Can I make this dessert ahead of time?
Yes, it’s great for making ahead. Prepare it up to 2 days before. This lets the flavors mix and the cookies soften.
Are there any dairy-free alternatives for this recipe?
Yes, use dairy-free whipped topping instead of Cool Whip. Choose vegan whipped cream or coconut cream. Make sure to pick dairy-free Oreos too.
How many servings does this recipe typically make?
It serves 8-10 people, depending on serving size. It’s great for family or small parties.
Can I freeze this icebox cake?
Freezing is possible but not recommended. The whipped cream and cookies might change texture when thawed. Enjoy it fresh.
Is this recipe kid-friendly to make?
Absolutely! It’s a fun project for kids. They can help with layers, mixing, and adding sprinkles with adult help.
Can I customize the sprinkles for different occasions?
Definitely! Change sprinkles for holidays, birthdays, or events. Use red and green for Christmas, pastels for Easter, or school colors for graduation.
What type of milk works best for briefly dipping the Oreos?
Whole milk is best for dipping Oreos. It adds rich flavor and softens the cookies. You can also use 2% or non-dairy milk.
How do I prevent the layers from becoming too soggy?
Dip Oreos briefly in milk and layer quickly. Don’t soak them too long. Use thick, stable whipped cream to keep the cake’s shape.
Are there any gluten-free alternatives for this recipe?
Use gluten-free sandwich cookies instead of Oreos. Make sure all ingredients are gluten-free. Always check labels for dietary restrictions.

