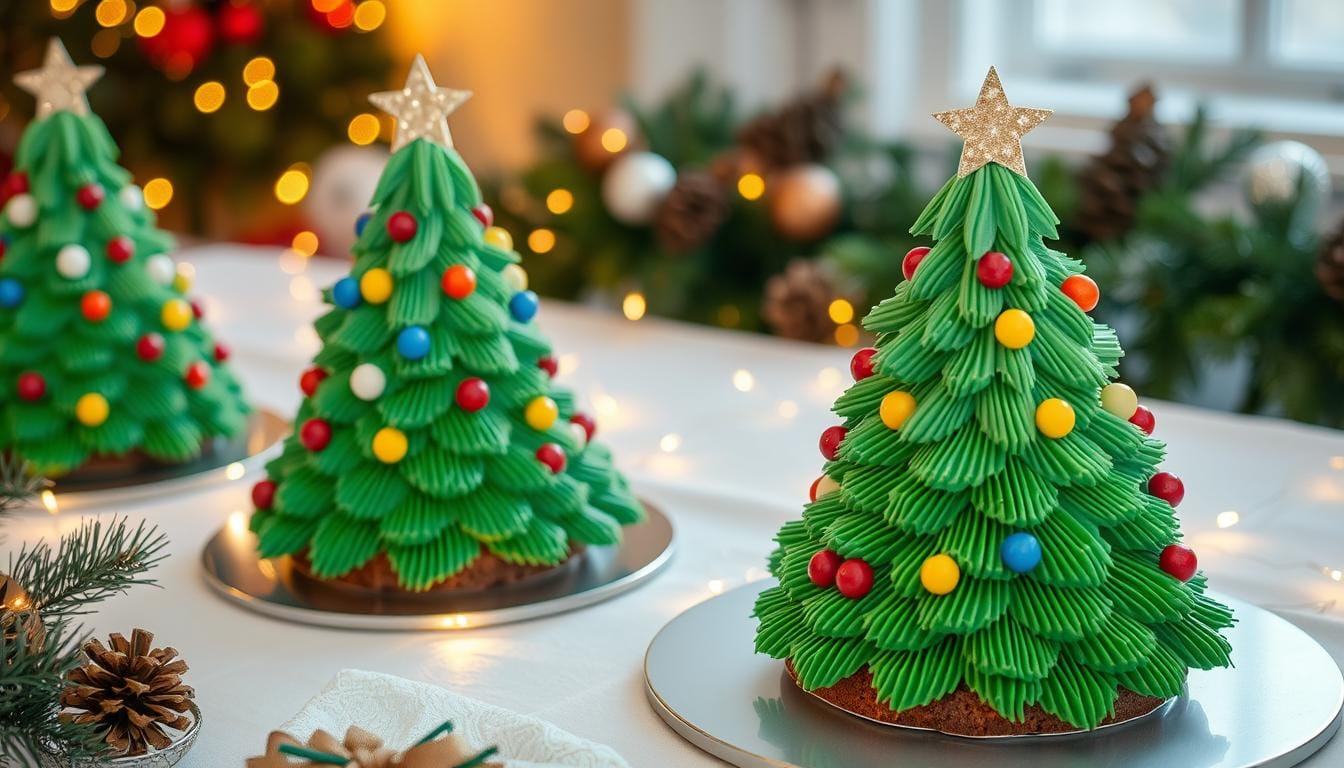
How to Make Homemade Christmas Tree Cakes
Every holiday season brings back warm memories. Christmas tree cakes were more than just desserts to me. They were magical moments of childhood joy, carefully savored with each bite.
Making these beloved Christmas tree cakes at home is a special adventure. It doesn’t matter if you’re a seasoned baker or just starting out. This recipe will help you create your own version of these iconic treats.
Table of Contents
Understanding the Classic Christmas Tree Cakes
Winter treats are a big part of holiday traditions. Tree-shaped desserts are especially loved during the season. Christmas Tree Cakes are more than just a sweet treat. They take us back to happy holiday memories.
History of Tree-Shaped Holiday Treats
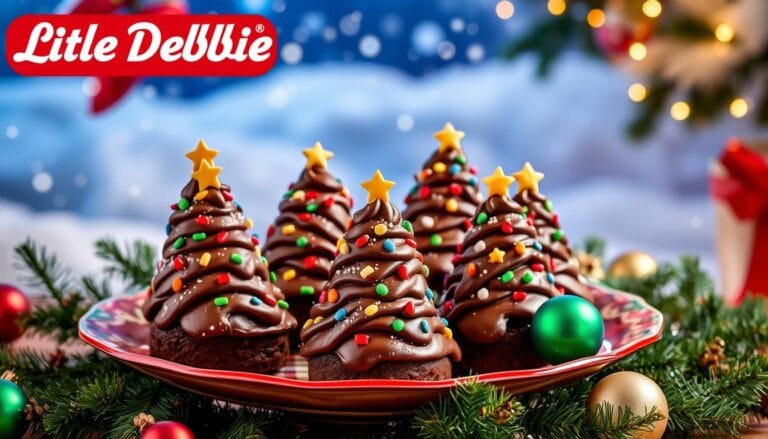
Yule log cakes have always inspired bakers. But Christmas Tree Cakes became a hit in the 1980s. Little Debbie made them a special holiday snack, full of holiday spirit in a small package.
- Originated in the early 1980s
- Seasonal limited-edition product
- Available from late October to early January
- Distinctive white icing with festive sprinkles
Why Homemade Versions Are Better
Homemade Christmas Tree Cakes beat store-bought ones any day. You can pick the best ingredients and flavors. Plus, you get a more real holiday treat experience that store-bought can’t offer.
“The magic of holiday baking is in the personal touch you bring to each creation.”
What Makes These Cakes Special
Tree-shaped treats are special because of their mix of textures and tastes. The soft cake, creamy filling, and sweet icing make a treat that feels like a childhood memory. It’s a taste of holiday joy.
- Soft vanilla cake base
- Fluffy marshmallow filling
- Festive white chocolate coating
- Colorful seasonal sprinkles
These treats are more than just a dessert. They’re a beloved holiday tradition. They add joy and sweetness to the holiday season.
Essential Ingredients and Equipment
Making delicious Christmas Tree Cakes needs the right baking supplies and tools. Start by getting the best ingredients and equipment for success.
Key Ingredients
- All-purpose flour from King Arthur or Pillsbury
- Granulated sugar
- Cocoa powder (Ghirardelli or Hershey’s)
- Unsalted butter from Kerrygold
- Semisweet chocolate (Guittard or Lindt)
- Marshmallow fluff
- Vanilla extract
Essential Kitchen Tools
- Stand mixer or hand mixer
- Jelly roll pan (10 x 15 inches)
- Parchment paper
- Christmas tree cookie cutter
- Cooling rack
- Piping bags and tips
Quality is key when picking your cake ingredients. Choose fresh, top-notch products for the best homemade Christmas Tree Cakes.
| Category | Recommended Brands | Quantity |
|---|---|---|
| Flour | King Arthur | 2 cups |
| Chocolate | Ghirardelli | 1 pound |
| Butter | Kerrygold | 1/2 cup |
“Baking is love made edible.” – Unknown
Pro tip: Measure your baking supplies carefully and have all tools ready before you start. This makes baking smooth and fun.
Making the Perfect Vanilla Cake Base
To make an amazing vanilla cake, you need to be precise and know the right baking techniques. The base of your Christmas tree cake is key. It should be soft and moist, ready to hold your festive decorations.
Professional bakers say the perfect cake texture comes from both ingredients and technique. Your vanilla cake’s success depends on several important factors. These factors turn simple ingredients into a delicious dessert.
Essential Ingredients for Cake Texture
- 2 3/4 cups (290g) sifted cake flour
- 1 cup (240ml) whole milk
- Room temperature butter and eggs
- High-quality vanilla extract
Mixing Techniques for Optimal Results
When making your vanilla cake, focus on these key mixing strategies:
- Cream butter and sugar until light and fluffy
- Add eggs one at a time, fully incorporating each
- Alternate dry ingredients with milk
- Mix just until combined to avoid a tough cake texture
Baking Temperature and Timing
Getting your Christmas tree cake base just right is all about precise baking. Preheat to 350°F and bake for 30-35 minutes. Follow these tips for a golden, moist cake every time:
| Baking Indicator | Perfect Result |
|---|---|
| Oven Temperature | 350°F |
| Baking Time | 30-35 minutes |
| Cake Doneness Test | Toothpick comes out clean |
“Baking is a science, but cake making is an art.” – Unknown Pastry Chef
Mastering these baking techniques will take your homemade Christmas tree cakes from good to amazing.
Creating the Marshmallow Buttercream Filling

Making the perfect marshmallow frosting is an art. It turns your Christmas tree cakes into something special. Your buttercream swirls will be the highlight of your holiday dessert, offering a light and fluffy texture that’s irresistible.
To make an amazing cake filling, you’ll need a few important ingredients:
- 1/2 cup unsalted butter, softened
- 1 cup powdered sugar
- 7 oz marshmallow fluff
- 1 teaspoon vanilla extract
- Pinch of salt
The key to a great marshmallow frosting is in how you make it. Start by beating the butter until it’s creamy. Then, add the powdered sugar slowly. Finally, gently mix in the marshmallow fluff for that airy feel.
“The perfect filling should be smooth, spreadable, and hold its shape beautifully on your cake.” – Pastry Chef Recommendation
Your cake filling will be rich and stable, ideal for making beautiful buttercream swirls. The mix of marshmallow fluff and butter gives your Christmas tree cakes a luxurious feel, making them look like they came from a professional bakery.
| Ingredient | Quantity | Purpose |
|---|---|---|
| Butter | 1/2 cup | Creates smooth base |
| Powdered Sugar | 1 cup | Adds sweetness and structure |
| Marshmallow Fluff | 7 oz | Provides light texture |
Pro tip: Refrigerate your marshmallow buttercream for 15 minutes before piping to achieve perfect, stable swirls.
White Chocolate Coating Techniques
Getting the perfect chocolate coating for your Christmas tree cakes takes skill. Learning dipping techniques can turn your treats into showstoppers. The right chocolate coating method is key to making your desserts look like they were made by a pro.
Melting and Temperature Control
Temperature is key when working with chocolate. Here’s how to get smooth, glossy results:
- Melt white chocolate or candy melts in a double boiler
- Keep the temperature between 86-90°F for the best consistency
- Add a tablespoon of coconut oil to help the chocolate flow better
Dipping Methods for Perfect Coating
Using professional dipping techniques can take your Christmas tree cakes to the next level. Follow these steps for a flawless chocolate coating:
- Freeze cake balls for 30-45 minutes before dipping
- Use a fork to carefully drop each cake ball into melted chocolate
- Gently tap the fork on the bowl’s edge to remove excess chocolate
- Place the dipped cakes on parchment paper to set
Troubleshooting Common Coating Issues
Chocolate coating can be tricky, but here are some tips to help:
| Problem | Solution |
|---|---|
| Chocolate becomes too thick | Gently rewarm it over a water bath |
| Chocolate develops streaks | Make sure the temperature is consistent |
| Coating doesn’t stick | Make sure the cake balls are well-chilled |
“The secret to perfect chocolate coating is patience and precision.” – Pastry Chef Expert
Remember, practice makes perfect with candy melts and chocolate coating. Don’t worry if your first tries aren’t perfect. Every attempt will improve your skills and help you create stunning Christmas tree cakes.
Decorative Elements and Designs
Cake decorating turns your homemade Christmas tree cakes into festive wonders. Your holiday designs can bring the magic of the season to life. They will amaze both your eyes and taste buds.

- Mimic Christmas tree lights with precise red frosting zigzags
- Create realistic tree texture using green sprinkles
- Add depth with carefully placed edible ornaments
Professional decorators suggest these techniques to make your cake stand out:
- Use a piping bag with a small tip for intricate red line details
- Apply green sprinkles immediately after white chocolate coating
- Experiment with natural food coloring for healthier options
“The secret to stunning holiday cakes is in the details” – Professional Pastry Chef
| Decoration Type | Popularity Rate | Complexity Level |
|---|---|---|
| Traditional Elements | 30% | Medium |
| Rustic Themes | 20% | Low |
| Festive Characters | 15% | High |
| Colorful Elements | 10% | Low |
Your Christmas tree cake can be a showstopper with the right decoration. Practice makes perfect in creating these seasonal treats.
Natural Coloring Options for Festive Decorations
Creating beautiful Christmas tree cakes is an art when you use natural food coloring and organic sprinkles. Your holiday baking can become stunning and healthy. This makes your decorations both beautiful and good for you.
To get vibrant colors without artificial stuff, you need to be creative. Home bakers can make treats that are full of wholesome charm.
Green Sprinkle Alternatives
Natural green sprinkles can make your Christmas tree cakes pop with earth-friendly options. Here are some cool alternatives:
- Finely chopped dried herbs like basil or parsley
- Crushed pistachios for a verdant green texture
- Matcha powder sanding sugar
- Dehydrated spinach powder
Natural Red Frosting Solutions
Red decorations can be made with cool natural food coloring tricks. Try these tasty options:
- Beetroot powder for deep crimson hues
- Pomegranate juice reduction
- Raspberry powder
- Concentrated strawberry puree
“Healthy decorations transform ordinary desserts into extraordinary culinary experiences.” – Culinary Experts
Innovative Decoration Strategies
Organic sprinkles are more than just color—they’re about making memories. Think about adding:
- Edible flower petals
- Finely ground nuts
- Toasted coconut flakes
- Dried fruit crumbles
Your Christmas tree cakes will surely get people talking with these natural, vibrant decorating tricks.
Assembly and Layering Process
Mastering cake assembly and layering is key for perfect holiday treats. Your Christmas tree cakes need careful prep for that bakery look. Precision and patience are essential during layering.
Begin by preparing your cooled cake layers with care. Follow these steps for successful cake assembly:
- Cut cooled cake into precise tree-shaped silhouettes
- Use a sharp cookie cutter or handmade template for consistent shapes
- Slice each tree horizontally into even layers
- Spread marshmallow filling generously between layers
Professional bakers say to spread marshmallow filling to the edges. This makes your holiday treat look and taste amazing.
“The secret to perfect Christmas tree cakes is in the details of layering and filling” – Pastry Chef Sarah Miller
To get the best results, freeze your cakes before coating with white chocolate. This keeps edges sharp and presentation clean.
| Layering Step | Key Technique | Recommended Quantity |
|---|---|---|
| Filling | Even Spread | 1/4 cup per cake set |
| Coating | White Chocolate | 3 cups total |
| Yield | Complete Cakes | Approximately 18 cakes |
Pro tip: Chilling your assembled cakes helps create a more stable structure for decoration and coating.
Storage and Preservation Methods
Keeping your homemade Christmas tree cakes fresh is key. Proper storage helps keep the taste and texture just right. This way, you can enjoy your holiday treat for days or weeks.
Learning about freezing desserts and preserving holiday treats is crucial. The right storage methods can make your festive cakes last longer.
Room Temperature Storage
For short-term storage, keep your Christmas tree cakes at room temperature. Here’s what to do:
- Store in an airtight container
- Keep away from direct sunlight
- Consume within 2-3 days for optimal freshness
Freezing Instructions
Freezing is a great way to store your holiday treats. Here’s how to do it:
- Wrap each cake individually in plastic wrap
- Place wrapped cakes in a freezer-safe container
- Insert parchment paper between layers to prevent sticking
- Freeze for up to one month
Shelf Life Guidelines
Each part of your Christmas tree cake has its own shelf life. Oil-based cake sponges stay moist for up to 7 days. Buttercream-decorated cakes can be frozen for up to four months if stored right.
“The key to preserving your holiday treats is understanding their unique storage requirements.” – Baking Experts
Pro tip: Thaw frozen cakes in the fridge to keep them fresh. A slow thaw helps your Christmas tree cake stay delicious.
Tips for Perfect Christmas Tree Cakes Every Time
Mastering holiday baking tricks takes precision and patience. To make the perfect Christmas tree cake, you need to focus on details. Some special baking tips can make your dessert go from good to amazing.
“Baking is an art, and cake perfection comes from understanding the subtle nuances of technique.” – Professional Baker
Here are key strategies for making your Christmas tree cakes spectacular:
- Use cake flour for an incredibly light and delicate texture
- Chill cake layers before cutting to achieve crisp, clean edges
- Freeze cake sandwiches for 20 minutes prior to chocolate coating
- Ensure all ingredients are at room temperature for smoother mixing
- Apply a thin layer of filling to prevent sliding between layers
When working with chocolate coating, keep the temperature just right. Add 1 teaspoon of shortening to thin your vanilla almond bark for smoother dipping. Sprinkle decorative elements like green sprinkles right after coating to make sure they stick well.
Professional bakers suggest using two 10 x 15 jelly roll pans for the best cake layer prep. With these tips, you’ll make Christmas tree cakes that are more than just desserts. They’re edible works of art.
Conclusion
Your homemade Christmas Tree Cakes are more than just a sweet treat. They turn a simple baking session into a special family moment. By making your own, you create a snack and a cherished memory.
Creating these treats lets you add your personal touch. You can pick the best ingredients and try out new decorating ideas. Your festive desserts will stand out and become a special tradition.
Handcrafting these iconic holiday cakes is a labor of love. They’ll be a hit at any family gathering or personal treat. Each cake is a story of warmth, creativity, and the joy of baking from scratch.
Baking is about making memories, sharing joy, and celebrating the holiday spirit. Your Christmas Tree Cakes show the love and care you put into your cooking. They’re a delicious reminder of the magic of the season.

